Kawasaki Cafe Racer on a Budget part 6
- Dennis
- May 16, 2018
- 3 min read
The sixth instalment of my first cafe racer project on a budget.
Restoring Parts, Front-end Assembly, Wheels & Tyres & New Exhaust System
A month has already passed since my last blog and during that time I've spent many hours restoring parts whilst waiting for two key components. I had ordered a new headstock bearing kit from an eBay seller and it had been marked as dispatched. Over a week later it hadn't arrived and when I contacted the seller to say I still wanted it, I immediately received a refund. Fortunately the next seller dispatched the replacement bearing very quickly so I was able to fit the forks, clip-ons, new dials and the headlamp.
I was also waiting for the Avon TT Classic tyres to arrive and whilst following the consignment tracking number I discovered they were out for delivery in the Medway area of the UK. I immediately contacted the supplier who got straight on the case and they arrived in Guernsey in the next few days. Anyway it gave me plenty of time to restore large and small parts, including the wheels.

I decided at the outset to have side panels as I like the appearance and it would also give me more space to locate all the electrics. My new panels which I have shown in a previous blog are much flatter than the original plastic boxes. This meant I had to find a way to locate some components further towards the centre of the frame. My solution is to modify the original battery housing so that it can be fitted inline with the frame instead of being mounted across. I will attach the solenoid and other small components to the side of the battery housing.

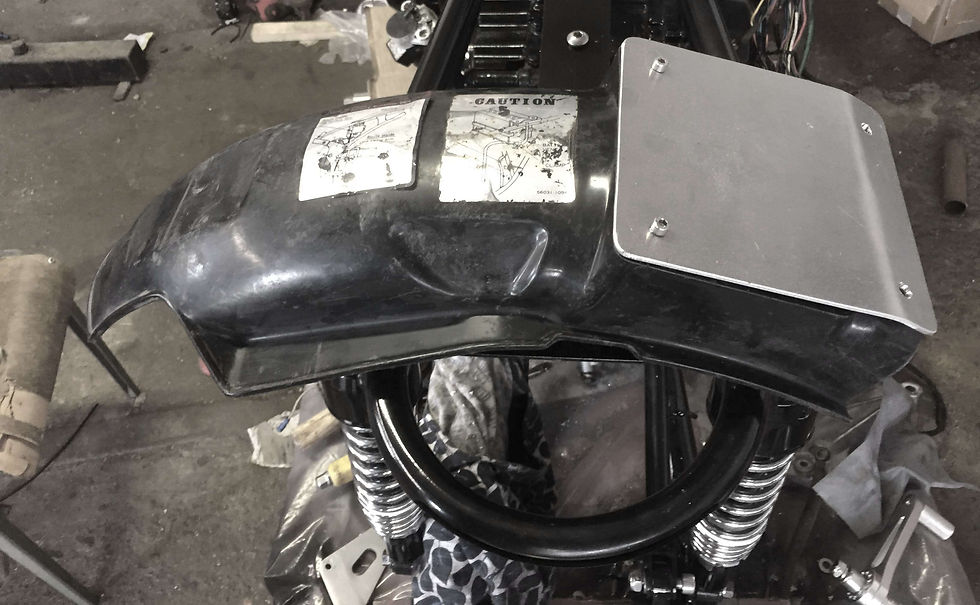
I'm also refitting the inner mudguard and I've added a plate to reenforce the thin plastic and to create a mounting point under the seat.

This video covers several stages of the restoration and build during the past four weeks. It includes the time-lapse of me fitting the tyres and inner tubes. Unfortunately, I learnt the hard way that sometimes it's better to get the rights tools for the job or better still take it to a professional. My efforts rather than saving me money ended up costing me £46 extra to fit new inner tubes after my improvised tyre lever punctured both tubes!
Progress in the past four weeks
Other parts I've purchased this month include, new spark plugs, plug leads, plug caps, oil filter, mini ignition switch and numerous trips to the hardware store for more stainless steel nuts and bolts. My most expensive single item has been the complete new Delkevic exhaust system. You may recall I had already bought an unused small megaphone style exhaust and I was planning to restore and wrap the old downpipes. When Paul, who I bought the bike off, said he wanted a complete stainless system for his Z750 I enquired at Delkevic.co.uk about a special discount for two systems and no VAT. Each system worked out at around £220 each. The build quality and finish on their systems is first-class and highly recommend. When fitting the headers it was discovered that one of the threaded stud holes in the cylinder head was cracked. With some careful drilling a re-tapping we made a successful repair.
I will be concentrating on brake callipers and the wiring loom next and also checking all bolts are fully tightened. Thanks for following.


Comments